Automatic Routing and PBX Integration
The FaxPress Premier is easily integrated with a variety of PBXs to provide automatic delivery of incoming faxes to the recipient's email mailbox or desktop. In both cases, the FaxPress Premier user mailboxes are assigned mailbox IDs that associate the mailboxes with their corresponding fax numbers. (See Configuring the User Properties: Mailbox IDs.)
Mailbox IDs consist of three, four or seven digits depending on how many digits the DID trunk or PBX is passing to the FaxPress Premier. If you’re not sure how many digits are being passed, and are not able to acquire this information from the phone company, use the FaxPress Premier’s dtmf.log file described in Determining the Number of Mailbox ID Digits to determine the number of digits the Premier is receiving.
Digit Strings and FaxPress Premier Parsing Capability
Digit strings are a combination of numeric and alphanumeric digits generated either by the PBX system or by the line carrier. Within the FaxPress Plus software is an algorithm that strips the non-essential information and retains the digit information required to identify the recipient’s mailbox ID.
If, as an example, the dialed number is 408-852-7081, the call may be sent as1188 408 852708199 while it is being routed through the central office or PBX system. Since the FaxPress Premier only requires the last three or four digits to identify the recipient, any unnecessary digits are parsed off the number, e.g. xxxxxx7081.
The FaxPress Premier has a configurable digit filter that allows it to support 40 different kinds of digit strings. These include but are not limited to the examples below.
For 4-digit mailbox IDs (e.g. a “7081” extension), the FaxPress Premier units can:
| ■ | From a 16 character set, strip 10 characters in front of the 4-digit mailbox ID, and 2 characters after the mailbox ID. |
| ■ | From a 10 character set, remove 5 characters in front of the 4-digit mailbox ID, and 1 character after the mailbox ID |
| ■ | From a 6 character set, remove 2 characters in front of the 4-digit mailbox ID. |
| ■ | From a 5 character set, remove a # sign before or after the 4-digit mailbox ID. |
For 3-digit mailbox IDs (e.g. an “081” extension), the FaxPress Premier units can:
| ■ | From a 15 character set, strip 10 characters in front of the 3-digit mailbox ID, and 2 characters after the mailbox ID. |
| ■ | From a 9 character set, remove 5 characters in front of the 3-digit mailbox ID, and 1 character after the mailbox ID |
| ■ | From a 5 character set, remove 2 characters in front of the 3-digit mailbox ID. |
| ■ | From a 4 character set, remove a # sign before or after the 3-digit mailbox ID. |
The FaxPress Premier requires a DID trunk or an analog PBX system, or a digital PBX system capable of digital to analog conversion. Once the FaxPress Premier is configured to map users' DID numbers to the corresponding FaxPress Premier accounts, it will direct inbound faxes accordingly.
If your PBX is purely digital, you’ll need a third party conversion device such as the Adtran Atlas to use the PBX with the FaxPress Premier. Analog PBX systems will integrate with the FaxPress Premier without a third party device.
If you’re using a DID trunk without a PBX system, you'll need a third party device like the Exacom DID Interface Module to provide the conversion required between the DID trunks and the FaxPress Premier's phone line inputs. The Exacom interface translates DID signals into DTMF signals recognized by the Premier.
Preparing your PBX System for Automatic Fax Routing
The primary consideration, when integrating the FaxPress Premier with your PBX, is to configure the PBX to transmit only the DTMF digits that determine the Mailbox ID, and no other digits such as A or D tone, or a string of digits preceding the number.
For more information on specific PBX systems, please view our library of PBX documentation on our support site: http://www.castelle.com/support/documentation
In order for your PBX to pass the DTMF tones to the FaxPress Premier you may be required to make some program changes to your PBX. The majority of PBXs are able to make custom program settings to integrate with a variety of voicemail systems. Your PBX will see the Premier as a kind of secondary voicemail system.
Once the FaxPress Premier modems are connected to the PBX analog ports, you will need to set your PBX to forward the DID information to those analog ports as DTMF signals.
If the PBX cannot be configured to transmit only the Mailbox ID digits, the Premier’s DID/PBX settings can be configured to strip unnecessary digits. The Premier’s DID/PBX settings allow you to configure the FaxPress Premier to extract only the necessary DTMF digits identifying the users’ mailbox IDs from the complete string passed by the PBX.
If you don’t know the complete digit string, and where in the string the necessary DTMF digits begin and end, see Determining the Number of Mailbox ID Digits to determine the number of digits the Premier is receiving.
Configuring the FaxPress Premier
The FaxPress Premier Server Properties and User Properties must be specifically configured with DID/PBX and Mailbox ID information to support automatic inbound routing. The Server Properties configuration is described here. The User Properties configuration is described in Configuring the User Properties: Mailbox IDs.
To configure the FaxPress Premier’s Server Properties for automatic routing using either DID or PBX, follow these steps:
| 1. | Open FaxPress Plus (Start>Programs>FaxPress Plus>FaxPress Plus), login as Administrator to the FaxPress Premier server, right-click on the server, and select Properties from the context menu. |
| 2. | Click on the Line Settings tab. |

For Routing Type, make sure the PBX/DID radio button is selected.
See DTMF Automatic Fax Routing for more information regarding DTMF routing.
If the trunk or lines provided by your phone company are inbound only lines, as is the case with DID trunk lines, make sure the Line Direction section’s Input Only radio button is selected. Otherwise, select Bi-Directional.
Although this is not specifically required for automatic inbound routing, make sure any prefix your PBX system requires for accessing Local, Long Distance, and International outside phone lines is entered in the PBX Pre-dial section. FaxPress Premier automatically inserts a 3 second pause after the PBX pre-dial code. This means that you do not have to insert a comma after the PBX digits.
| 3. | Select the Dialing Properties tab. The information here is required for PBX outbound integration, but is not specifically required for automatic inbound routing. |

If your PBX system requires passwords for access to an outside line, check Dial Access Code in the When dialing through PBX. From the pull down menu on the right select whether to insert the password Before or After the number is dialed.
| 4. | Select the DID/PBX tab. |

Use the Total String Length field to enter the number of digits the PBX passes in the complete string, including the mailbox ID.
Use the Number of Mailbox ID Digits field to enter the number of digits used in the mailbox ID. The FaxPress Premier supports up to 7 digits for the Mailbox ID, although Mailbox IDs are more commonly 3 or 4 digits.
Use the Starting Position field to enter the mailbox ID’s starting position in the string, i.e. whether it’s positioned at the beginning, in the middle, or at the end of the string.
Use the Mask Value field to enter the entire digit string passed by your PBX system or DID trunk line. Use DDDD to represent the digits the Premier will use for the Mailbox ID, and X to represent the unnecessary digits the Premier will strip. The FaxPress Premier supports up to 7 digits for the Mailbox ID, although Mailbox IDs are more commonly 3 or 4 digits.
In the Incoming Faxes section, the Administrator and Unaddressed radio buttons allow you to specify the destination for incoming faxes that are either misaddressed or without a recognizable mailbox ID.
Configuring the User Properties: Mailbox IDs
To enable automatic inbound routing, FaxPress Premier user accounts must be assigned mailbox IDs that associate them with their corresponding DID trunk or PBX phone numbers. Mailbox IDs are three or four digits, depending on how many digits your T1, DID trunk, or PBX is passing to the FaxPress Premier.
To configure the User Properties with Mailbox IDs, follow these steps:
| 1. | Open FaxPress Plus and log into a server with Administrator privileges. |
| 2. | Expand the Administration branch. |
| 3. | Click on Users. The list of current user mailboxes is displayed in the right panel. |
| 4. | Right click on a user mailbox and select Properties to open the User Properties window. |

In the User Properties screen, with the User Account tab selected, enter an identifier number in the Mailbox ID field. The identifier number may contain up to 7 DTMF or DNIS digits, although more commonly the Mailbox ID will be 3 or 4 digits. If necessary, enter a PBX access code in the PBX Access Code field.
See Creating and Configuring FaxPress Premier User Accounts for more information on configuring the other User Properties.
Determining the Number of Mailbox ID Digits
If you’re not sure how many digits your T1 line, DID trunk line or PBX is passing to the Premier, and have not been able to acquire this information from your telephone company, use the To enable DID receiving diagnostic mode to record, in a dtmf.log file, the mail box IDs of all fax recipients, the time of the incoming faxes, and the number of DTMF digits passed by the PBX.
To enable the DID receiving diagnostic mode, follow these steps:
| 1. | Select the Advanced Functions tab. |
| 2. | Check To enable DID receiving diagnostic mode. |
| 3. | Click OK. |

| 4. | Next, send a test fax from an external fax machine through your DID, T1 and or PBX system into the FaxPress Premier. Use any fax number in the range of numbers reserved for the Premier’s fax channels. |
| 5. | Open the Unaddressed mailbox to confirm the test fax has been received. (All incoming faxes will automatically sent to the Unaddressed mailbox until Premier users’ mailboxes are configured for automatic inbound routing, with Mailbox IDs mapped to fax numbers, etc.) |

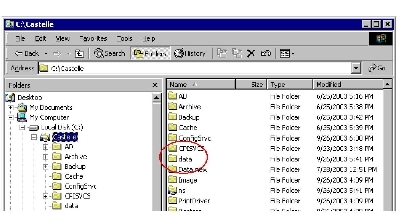
| 6. | Next, use Windows Explorer to browse to the Premier’s C:\Castelle\Data directory. Use either Remote Desktop or a local mouse, keyboard, and monitor attached to the Premier to log in. (See Required Setup Proceduresfor information on using Remote Desktop.) |
| 7. | Open the dtmf.log file to see the complete string of digits the Premier is receiving. Use this information to determine the digits required for your users’ Mailbox IDs. (See Configuring the User Properties: Mailbox IDs.) |
Very infrequently, the T1 line will not synchronize properly between the Premier and the central office. This will cause issues with sending and receiving multiple page faxes. In this case, the Premier fax board can be configured to synchronize with the connected T1 line. See Synchronizing the Premier Fax Board with the T1 for information.
In DTMF automatic routing, the fax sender uses your mailbox’s four-digit Mailbox ID to address the fax. To send a fax to a specific mailbox, the sender dials the Premier’s phone number, and then addresses the fax using the recipient mailbox’s four-digit Mailbox ID.
If your FaxPress Premier uses DTMF routing, any fax machine with a touch-tone keypad can use DTMF dialing procedures to address faxes directly to FaxPress user mailboxes. Faxes automatically routed to your mailbox appear in your personal Incoming fax list, and do not appear in the Unadddressed fax list. DTMF dialing can be used to address a fax to one mailbox per call.
Fax senders must know your Premier mailbox ID in order to use DTMF dialing. Faxes not specifically addressed with DTMF dialing are automatically routed to the Unaddressed mailbox, where they must be viewed and manually routed by a user with Router privileges. Be sure to provide your FaxPress mailbox ID to people who send you faxes.
Sending faxes via DTMF directly to a Premier mailbox requires the sender to use the following addressing procedure:
| 1. | Using a fax station with a touch tone phone or keypad, dial the FaxPress Premier’s fax number. The FaxPress Premier will answer the call with a fax data squeal. |
| 2. | Wait for the end of the fax data squeal, then press * on the keypad. The Premier will then respond with three tones to confirm DTMF mode. If the Premier does not respond with three tones, try pressing the * again. |
| 3. | After the three tones, dial the destination mailbox ID on the touch-tone keypad, and then press # #. The Premier will respond with three tones to verify input, followed by ready tones. |
| 4. | Start the send operation. |
If the Premier does not have a mailbox with the specified ID, it replies with one long tone to signify a sequence error. If this happens, clear the error by pressing # #, then return to step 2.
In short, the DTMF dialing syntax is as follows:
fax number (fax squeal) * (3 tones) mailbox ID ## (3 tones)
For troubleshooting help regarding your DTMF automatic routing, please refer to the Microsoft Word document: Automatic Fax Routing Troubleshooting.
|
FaxPress Premier WebHelp
Last Updated: 11/1/2007
E-mail this page |
Castelle 855 Jarvis Drive, Suite 100 Morgan Hill, CA 95037 Toll-free 800.289.7555 Tel 408.852.8000 Fax 408.852.8100 |